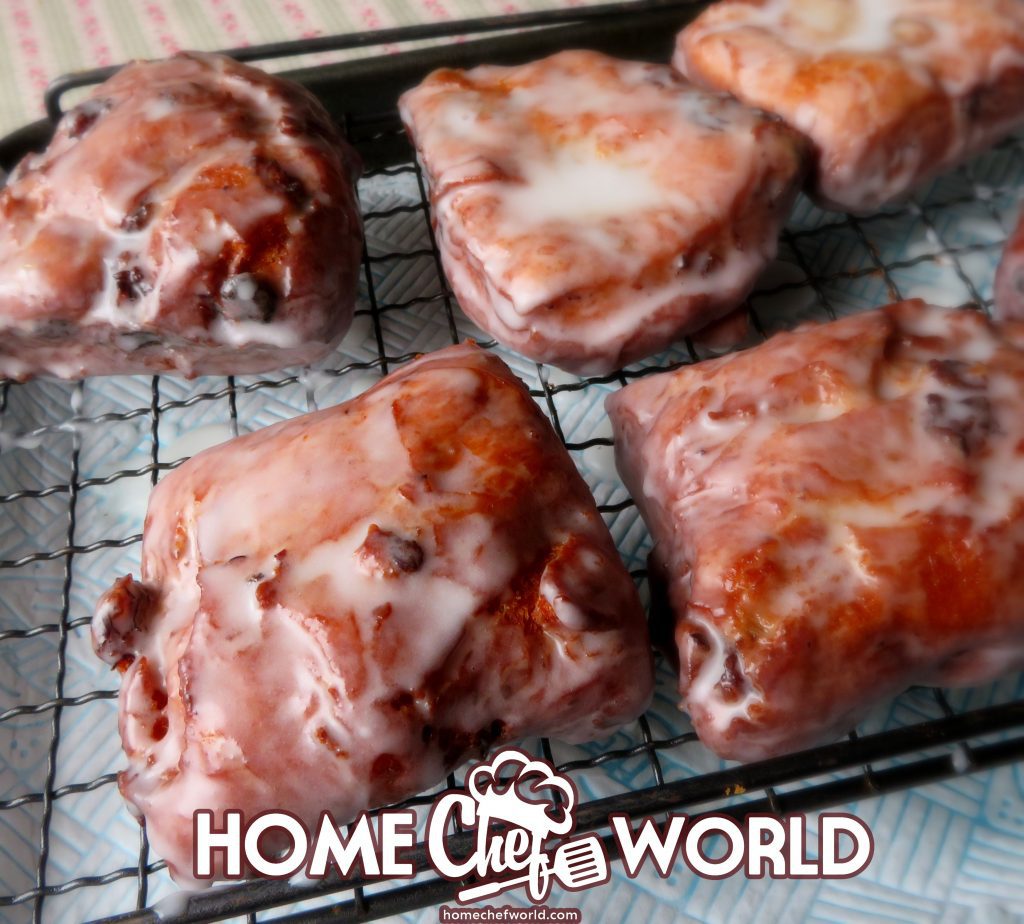
The recipe I am sharing today is for a much beloved Canadian doughnut known as the Dutchie! Canadian Dutchies are one of my favorite doughnuts. Square in shape, sultana raisin studded, lightly spiced, yeast lifted and sugar-glazed, these delicious treats are the favorite of everyone I serve them to! A delicious treat is what you need. Your friends and family will surely love this treat.
Dutchie doughnuts were once served at a national chain of coffee shops but were taken off the menu several years ago for reasons unknown. It defies belief as they were one of the most popular doughnuts on the menu. Because of its superb flavor, many people have to look for more Canadian Dutchies. No need to worry because this recipe is within your reach. You eat this dessert any time of the day by making your own. This recipe is affordable and accessible.
What’s a Dutchie aficionado supposed to do? Why create a version of your own of course!! If anything I think these sweet puffs of deliciousness are even tastier than the original!

I have always adored them. They are similar in flavor and texture to the Dutch Olliebollen treats which are a standard in most Dutch households during the holiday season. I can’t speak for that with any certainty, but I can assure you that these are incredibly tasty!

What You Need To Make Canadian Dutchies
Simple ordinary ingredients that most of us have in our homes at all times.
| INGREDIENTS |
| Sultana Raisins |
| Milk (I use full fat) |
| Instant Yeast |
| Granulated Sugar |
| Ground Cinnamon |
| Butter |
| Egg |
| Salt |
| Bread Flour |
| Canola Oil for frying |
| Icing Sugar to glaze |

Hints And Tips
By following my hints and tips, there is no reason why you can’t have success with this recipe!
1. Read through the recipe several times before beginning to help familiarise yourself with any ingredients, equipment, or techniques you may need to use. I have found that doing this makes things a lot easier for me in the long run.
2. Assemble everything you are going to need for the recipe before beginning. This can help to prevent you from leaving anything out that is integral to the success of the recipe.
3. Make sure you plump the raisins up in some boiling water. Plumped raisins mix in better than dry raisins.
4. Have all of your ingredients at room temperature if possible for quicker and nicer proof.
5. Be careful not to overheat your milk. There is no faster way to kill your yeast than to have your liquid ingredients too hot.
6. Don’t skimp on the kneading. I have used my stand mixer with a dough hook for this, but you can also do it by hand. You want to achieve a smooth satin-like dough that pulls away from the sides of the bowl, and which has no lumps, sticky, or dry patches.
7. If you have a drafty house, it helps to set the bowl of rising dough into a larger bowl of warm water to create a nice warm environment for the dough to prove in. Make sure your bowl of dough is covered so that air can’t get in to dry it out.
8. Also make sure your bowl is properly oiled so that the dough doesn’t stick.
9. You can tell when your dough is properly proven when you stick a finger into the dough and the dimple you make remains.
Moreover
10. For the second rise you can leave the tray of dough squares on the back of a warm stove, or near a warm heater to help keep the dough rising properly.
11. Use a frying thermometer to correctly measure the temperature of the oil. Too hot and your doughnuts will brown too quickly on the outside and not be cooked inside. Too low and your doughnuts will absorb too much of the oil when cooking. 350*F is the correct temperature for the oil.
12. Don’t crowd the pan when frying the doughnuts. I don’t like to cook these any more than two at a time for the best results.
13. Drain them well on paper towels after cooking to absorb any excess oil.
14. I use two forks to properly turn, coat, be well-drained and flip the doughnuts in the glaze. Once coated leave them to set up on a wire rack. This also allows for any excess glaze to drip away. (Note, place some paper towels, or wax paper beneath the wire rack to catch any glaze and create less mess.)
15. As with all yeast bread and most bread snacks, like strawberry bread, these are best eaten on the day.
How To Make Canadian Dutchies
There is nothing complicated about these. They do take a bit of time and a little bit of effort, but the best things in life usually do.
Put the raisins into a large measuring cup and cover it with 1 cup of boiling water. Let stand for 10 minutes, then drain very well.
Heat the milk in the microwave for 30 seconds, until warm. (You should be able to easily dip a finger into the milk and it should not feel in the least bit hot.
Add the flour and beat on medium-high using the dough hook for 5 to 8 minutes, or until the dough forms a ball and pulls away cleanly from the sides and bottom of the bowl. (You may need to add a bit more flour. The dough should not be sticky.)
Moreover
Scrape into a lightly oiled bowl. Turn in the bowl to oil the top and cover with a damp tea towel.
Leave to rise in a warm place until doubled in size, about 1 hour.
Line a large baking sheet with some buttered foil.
Pat or roll the dough out on a lightly floured surface into a rectangle that is roughly ½ inch thick.
Cut the dough into 12 equal-sized pieces and place each on the prepared foil, leaving space for them to rise. Cover with the damp tea towel again and leave in a warm place to rise until double once more, a further 45 minutes.
Pour canola oil into a large pot to a depth of an inch. Clip on a deep-frying thermometer. Heat the oil over medium heat until the temperature reaches 350*F. (Adjust the heat as required during cooking to maintain this temperature throughout the cooking time.)
Add the doughnuts one or two at a time to the hot oil. Cook for 3 to 4 minutes in total time, carefully flipping them over halfway through the cooking time. Drain on paper towels and repeat until all the donuts have been fried.
Place a wire rack over some wax paper or baking paper.
Whisk the icing sugar and water together for the glaze until smooth. Dip the doughnuts into this glaze coating them completely, allowing any excess to drip away. Place them onto the wire rack and allow them to sit until the glaze is set and firm.

Suggestions For Serving Canadian Dutchies
These make for the ultimate weekend snack/treat for the family. They are beautifully served for breakfast or brunch along with some fruit juice and fresh fruit on the side.
They make a lovely coffee/tea break snack for mid-morning or afternoon.
These are wonderful served along with some hot chocolate after you have been out with the family looking at the Christmas lights in the neighborhood, after skiing or skating, or whatever the occasion when you feel in need of a hot drink and a pick-me-up!!
Although these are best served on the day, any leftovers can be kept in an airtight container for up to two days. For longer storage, I recommend freezing them. Allow to thaw completely and come to room temperature before serving and eating.

This Canadian Dutchies classic doughnut is destined to become a family favorite in your home. Impossibly fluffy and rich without being too sweet. Studded with sticky sultana raisins and lightly spiced, with a finger-licking sweet glaze I guarantee it will be hard to stop yourself from eating just one of these!


Canadian Dutchies
Ingredients
Method
- Put the raisins into a large measuring cup and cover with 1 cup of boiling water. Let stand for 10 minutes, then drain very well.
- Heat the milk in the microwave for 30 seconds, until warm. Pour into the bowl of a stand mixer. Add the yeast and stir. Let sit for 10 minutes. Beat in the well-drained raisins, cinnamon, sugar, melted butter, egg, and salt.
- Add the flour and beat on medium-high using the dough hook for 5 to 8 minutes, or until the dough forms a ball and pulls away cleanly from the sides and bottom of the bowl. (You may need to add a bit more flour. The dough should not be sticky.)
- Scrape into a lightly oiled bowl. Oil the top and cover with a damp tea towel. Leave to rise in a warm place until doubled in size, about 1 hour.
- Line a large baking sheet with some buttered foil.
- Pat or roll the dough out into a rectangle that is roughly ½ inch thick. Cut the dough into 12 equal-sized pieces and place each on the prepared foil, leaving space for them to rise. Cover with the damp tea towel again and leave in a warm place to rise until double once more, a further 45 minutes.
- Pour canola oil into a large pot to the depth of an inch. Clip on a deep-frying thermometer. Heat the oil over medium heat until the temperature reaches 350*F. (Adjust the heat as required during cooking to maintain this temperature throughout the cooking time.)
- Add the doughnuts one or two at a time to the hot oil. Cook for 3 to 4 minutes in total time, carefully flipping them over halfway through the cooking time. Drain on paper towels and repeat until all the donuts have been fried.
- Place a wire rack over some wax paper or baking paper.
- Whisk the icing sugar and water together for the glaze until smooth. Dip the doughnuts into this glaze coating them completely, allowing any excess to drip away. Place them onto the wire rack and allow them to sit until the glaze is set and firm.
- Enjoy!
Check out more recipes that you will surely love to have with your family. Creamy Salad Recipe, Mac and Cheese Recipe, & Blueberry Pancake Recipe.

Marie Rayner is a retired Chef, freelance writer, recipe developer, food blogger, and Cookbook author. She makes her home in Chester, UK, where she lives with her husband, Todd, and their much beloved English Cocker, Mitzie. Her motto is “Life is far too short to eat bad food,” and her goal is to share delicious and easy recipes which anyone can enjoy and cook in the comfort of their own home.
 Easy German Casserole Recipe With Leftover Ham And Potatoes
Could I exchange the raisins for chopped dates and also add walnuts? These look very closely like date nut squares, but a recipe for those is hard to find. These look delicious!