No tea party would be complete without a tray of beautiful light and fluffy Classic English Scones. These are a real classic and an absolute “must-have” for such an occasion. I am happy to share my fool-proof recipe with you today for these very British delicacies!
Scones 101
Some people might be tempted to think that scones and biscuits are the same things, but they are two completely different creatures. They might be similar in appearance, but that is where any similarity ends.
Scones are somewhat sweeter than biscuits and have a crumbly rather flaky texture. More often than not they will be studded with some kind of dried fruit scattered throughout, usually sultana raisins, or dried currants. Glace cherries are also very popular.
They are also perfect to be enjoyed spread with cream and jam and served up with hot cups of tea!
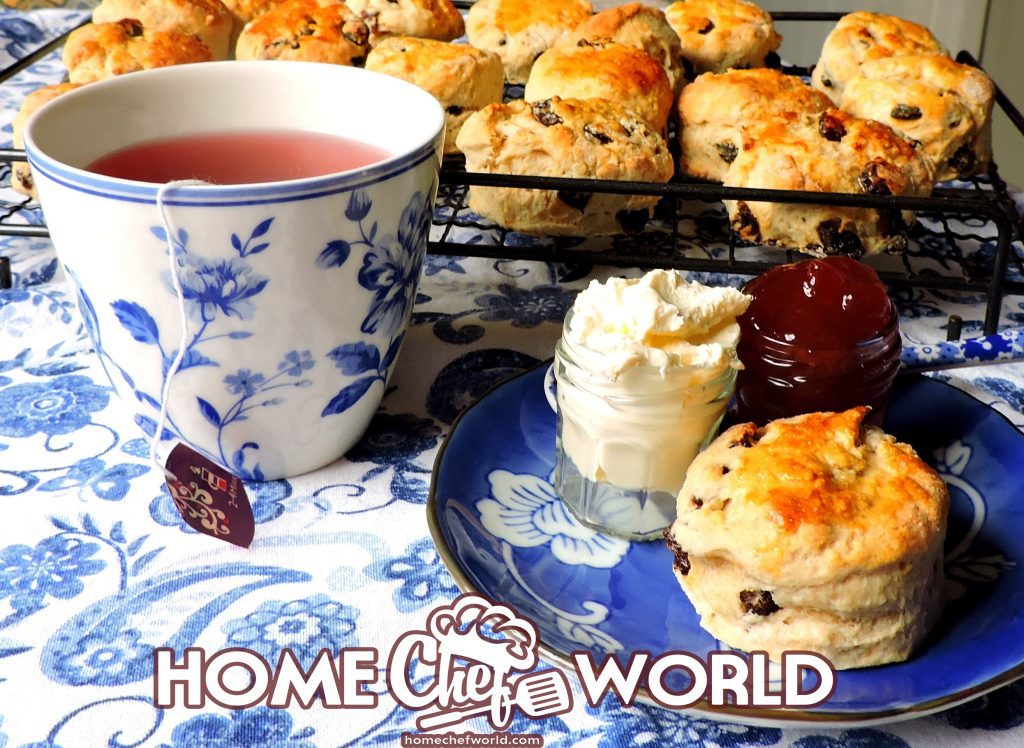
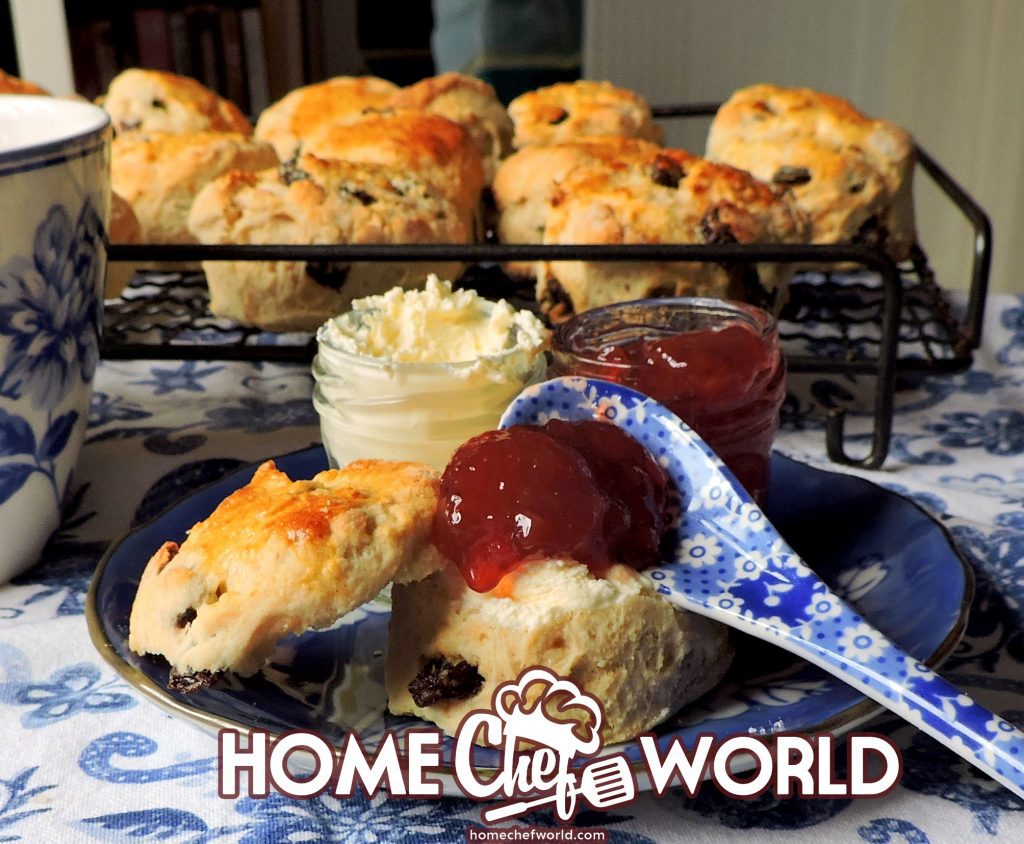
In England, you can find dedicated tea shops all over the country that serve nothing but freshly baked scones. These are served along with jam and cream and of course nice hot pots of freshly brewed tea! This is called a “Cream Tea” and is a source of great pride.
The scones are meant to be split, spread with softened butter, and then spread with cream (usually clotted cream) and a sweet berry jam. Arguments are often fought over which you spread on first, the jam or the cream. The correct answer varies according to which part of the country you hail from!
No matter which group you choose to affiliate with, however, these are just plain delicious! Try other baked desserts with that tea, as well, like the French toast casserole.

What do You need To Make Classic English Scones?
Simple ingredients are put together in the most delicious way.
| INGREDIENTS |
| 2 ½ cups self-raising flour |
| 1 1/2 tsp baking powder |
| 5 ½ TBS of cold butter |
| 2 ½ TBS Caster sugar (superfine granulated sugar) |
| ½ cup sultana raisins |
| scant 2/3 cup milk |
| 2 large free range eggs, beaten |
| granulated sugar to sprinkle plus flour for dusting |
Hints And Tips
With these hints and tips, there is no reason why you cannot have great success with these!
1. Read through the recipe several times to help familiarise yourself with any ingredients, equipment, or skills you may need to use.
2. Assemble all of the required ingredients prior to starting. This can help to prevent you from leaving out anything integral to the recipe! It also helps to speed up the preparation time.
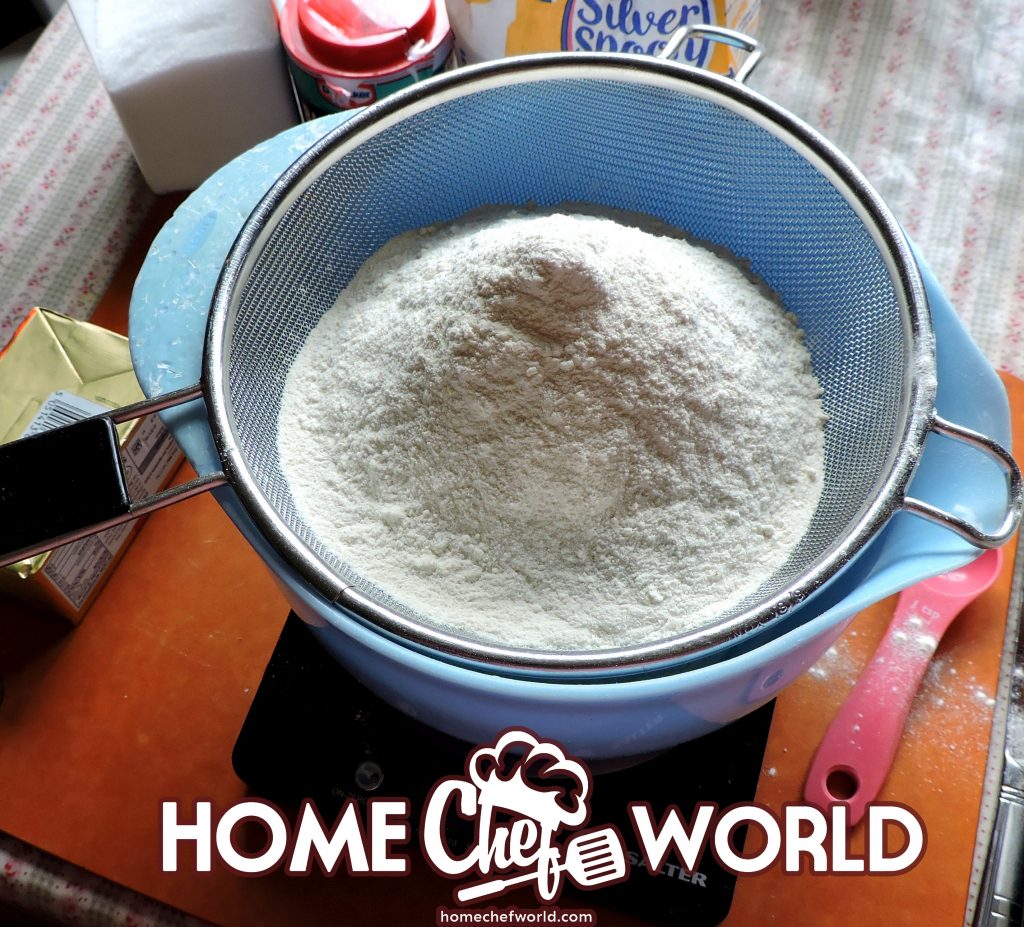
3. When measuring out the flour and sifting it together with the baking powder and salt, you want to sift it into the bowl from a height of about 6 to 8 inches above the bowl. This helps to aerate the flour and will give you a much better rise. (I also use self-rising flour. See the recipe note below for how to make your own.)
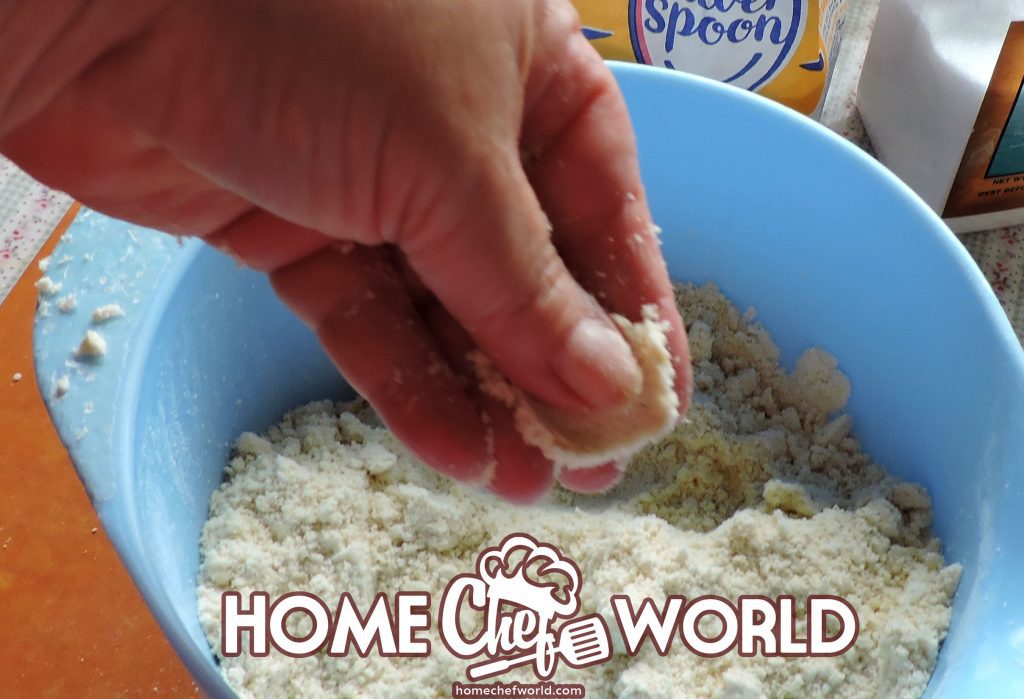
4. Make sure your butter is really cold when you drop it in. Also, be sure to use cold hands. You will need to rub the butter into the flour as you don’t want it to melt. Cold hands and cold butter will make sure this doesn’t happen. If you think your butter has warmed up too much after cutting it into small bits, pop it onto a plate and stick it into the refrigerator or freezer for a few minutes to chill. I find rinsing my hands in cold water and drying them helps to keep them cool.
5. Use a snapping motion with your fingertips to rub the butter into the flour. Use only your fingertips. When it has been rubbed in properly it should resemble fine dry breadcrumbs. It is only then that you can stir in the sugar and sultanas. You don’t want any larger bits. It should very much resemble wet sand.
6. Make sure you reserve some of the beaten egg and milk mixtures to use as a glaze.
7. Use a round-bladed knife to stir the wet ingredients into the dry. Make a hollow in the center of the dry ingredients and pour it in. You will have a soft, slightly tacky dough that holds well together, but don’t think you have done something wrong. It should be this way.
8. Tip this dough out onto a lightly floured board and knead gently for a few turns before patting it out. Do not over-flour your board and do not over-handle your dough. Over-flouring and over-handling will result in a tough scone which is not ideal.
9. I favor lightly patting the dough out rather than rolling it, again to keep the scones tender.
10. Use a fairly sharp round cutter with a straight edge to cut them out. When cutting use a sharp up-and-down tapping motion. Do not twist the cutter at all. When you twist the cutter you seal the edges of the dough and this hampers the rise. Your scones will not be as tall, and they can also bake lop-sided.
11. Try to get as many cuts as you can from the first cut. You can gather and repeat the scraps to cut out more scones but do bear in mind that these will not be as attractive as the first cuts.
12. Leave plenty of space between the scones on the baking sheet so that the air can circulate around them freely.
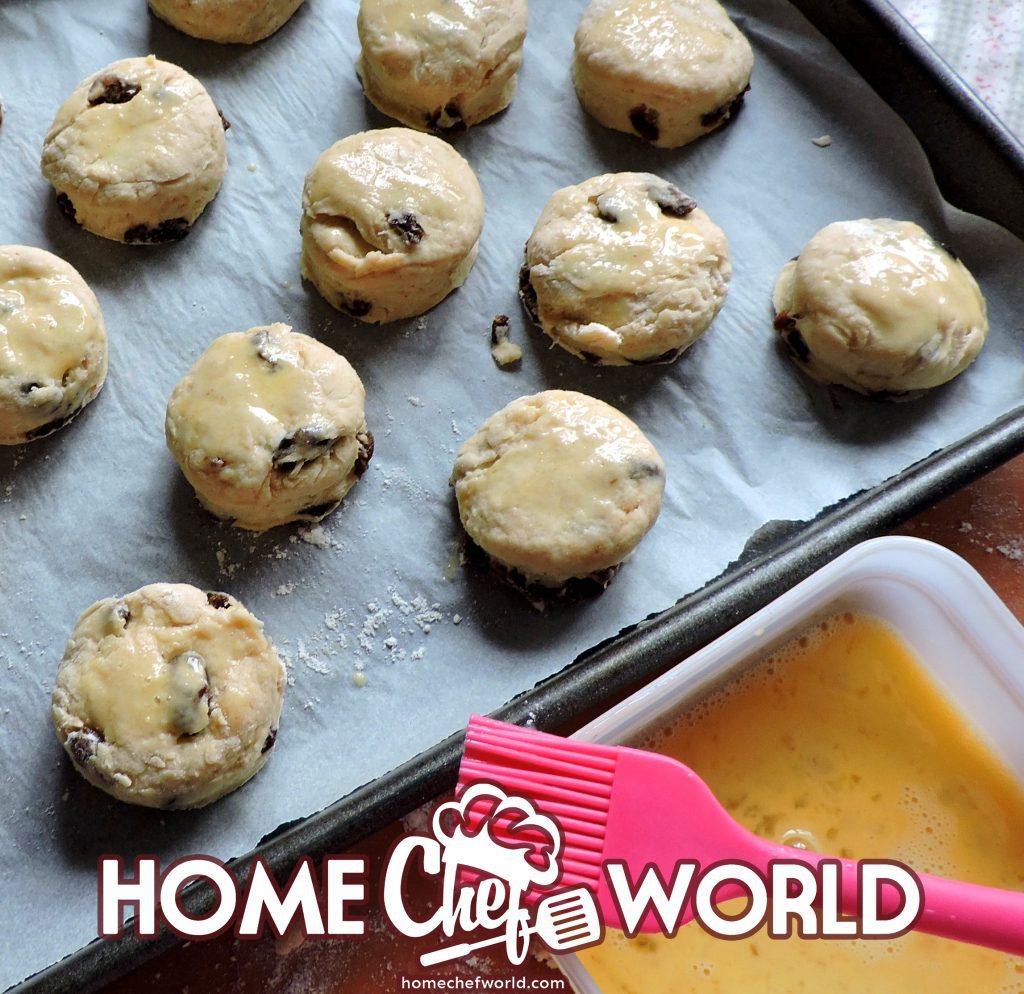
13. When brushing on the reserved egg/milk glaze take care that it doesn’t drip down the sides of the scones. Drips will also hamper the rise.
How To Make Classic English Scones
If you follow my directions precisely be prepared to have the best classic English Scones ever!
Preheat the oven to 220*C/425*F/ gas mark 7. Butter a large baking tray. Alternately line it with greaseproof paper.
Measure the flour into a bowl along with the baking powder. (Pour the flour in from up high to aerate it.) Whisk together well.
Drop in the cold butter in bits.
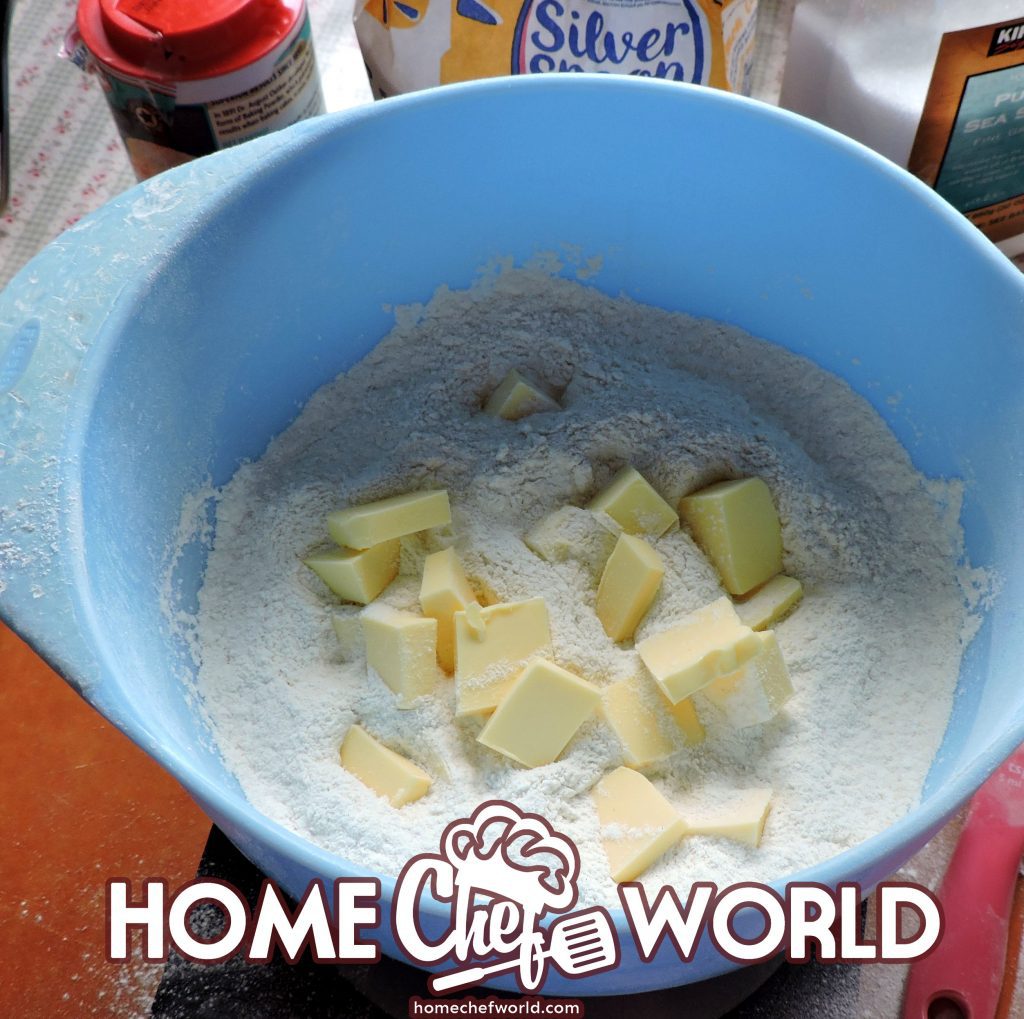
Using your fingertips rub the butter in quickly until the mixture resembles fine dry breadcrumbs.
Stir in the sugar and raisins.
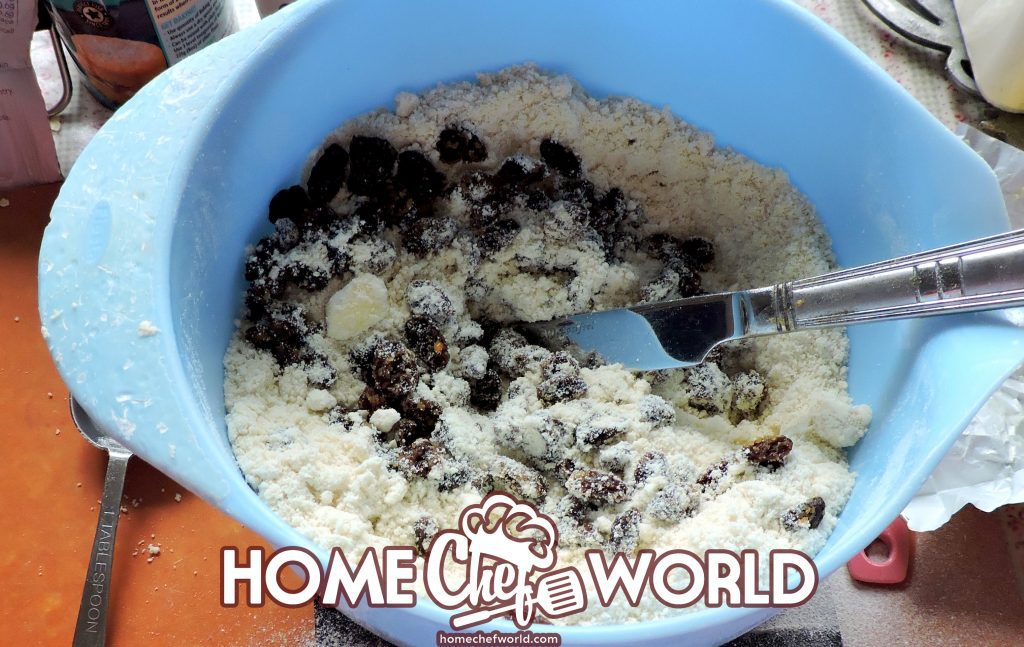
Beat the eggs, then remove and set 2 TBS aside.
Add a scant 1/2 cup of the milk to the eggs and beat well together. Stir this into the flour mixture. Mix everything together with the rounded end of a butter knife to form a soft but slightly tacky dough. Only add the remainder of the milk if your dough is too dry and you want to absorb any dry bits in the bowl. The dough should not be too wet, but not too dry either.
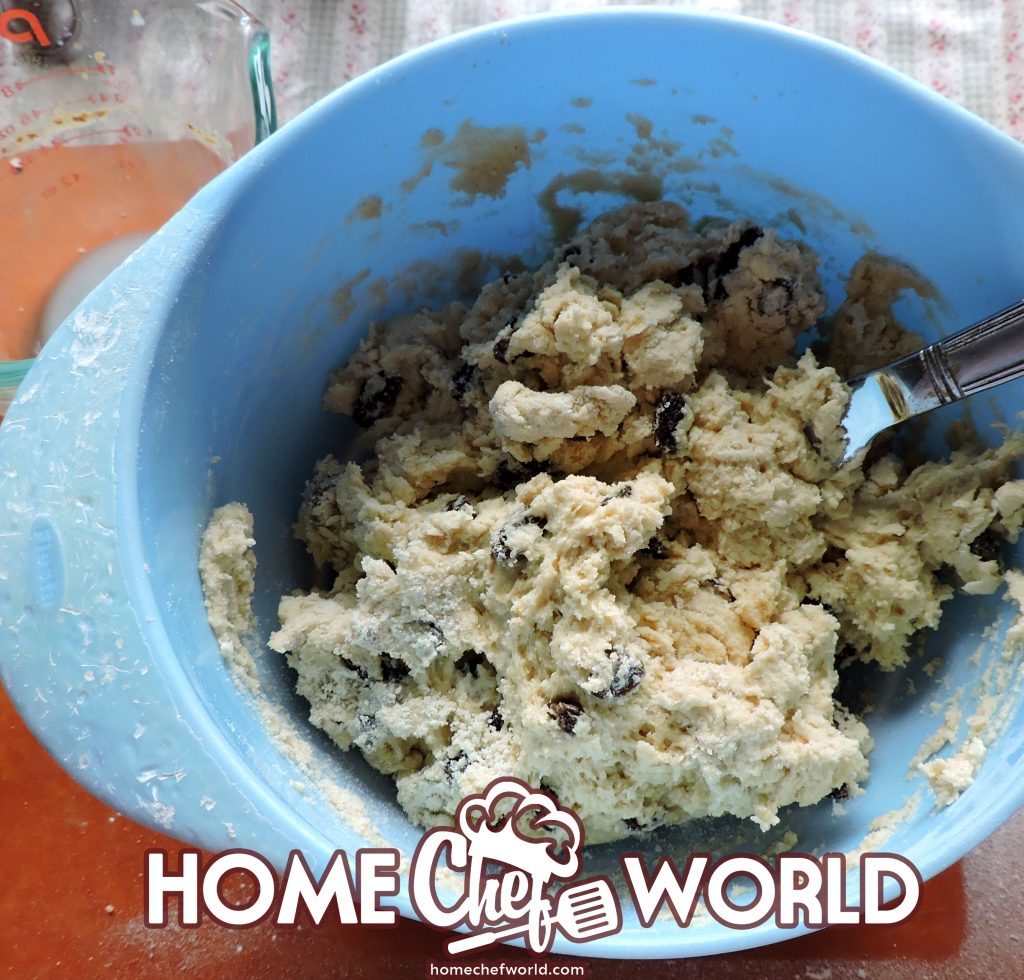
Tip the dough out onto a lightly floured surface and knead gently a couple of times to bring it well together.

Gently pat out to a 1-inch thickness. Using a sharp round 3-inch cutter, stamp out rounds, using a direct up-and-down motion. Do not twist the cutter, however.
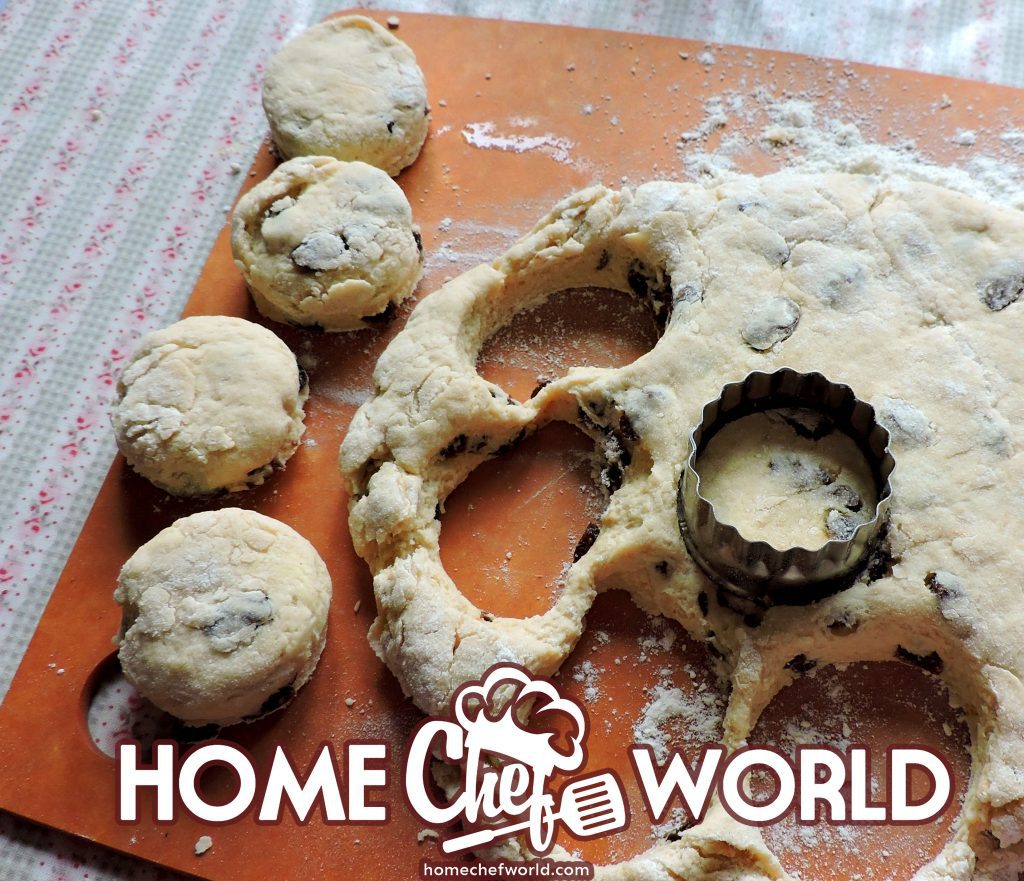
Place the cut-out scones an inch or so apart on the baking sheet. Gather any trimmings
together and repeat until you have 10 scones.
Brush the tops of the scones with the reserved beaten egg and sprinkle with a bit of granulated sugar. Do not let the egg drip down the sides because this will hamper the rise.
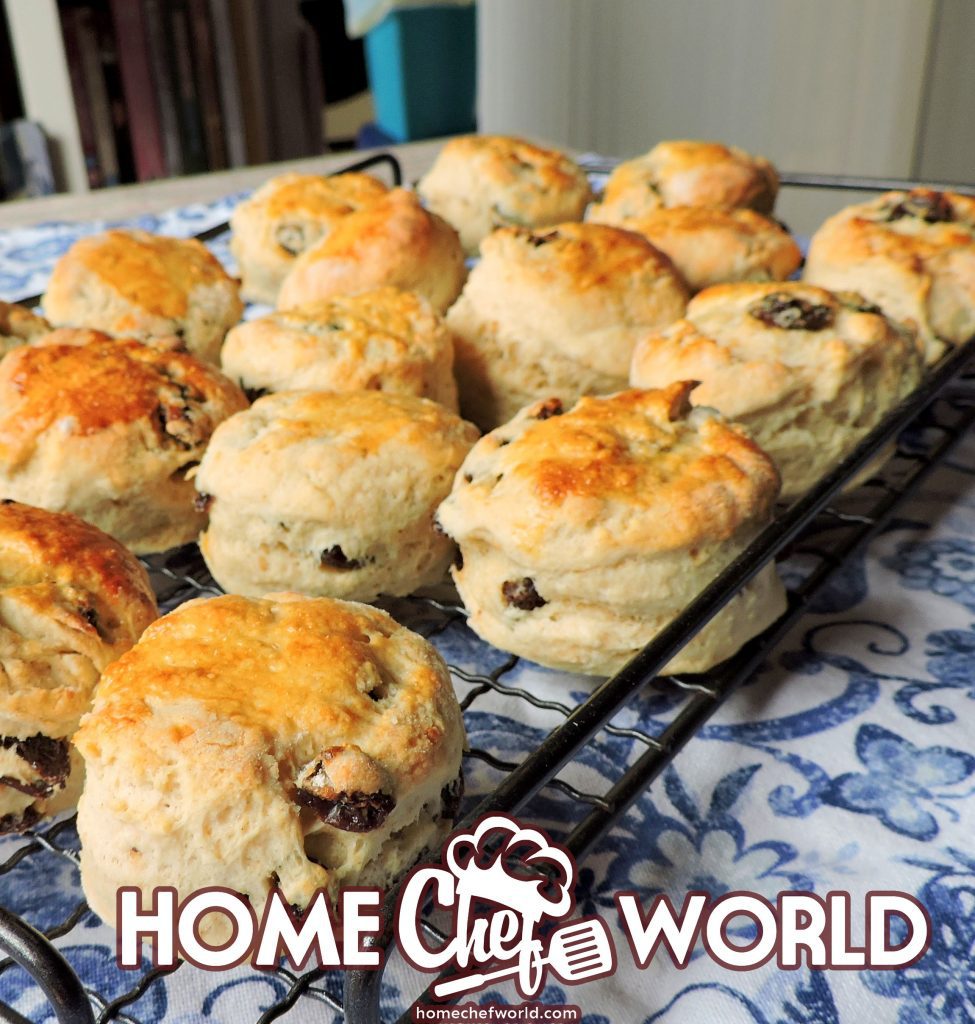
Bake for about 10 minutes, until risen and golden on top and bottoms.
Remove to a wire rack to cool and store in an airtight container.
These are best eaten on the day; however, any leftovers can be frozen for several months.
Serving Suggestions
For the ultimate English experience, you will want to enjoy your lovely fresh-baked scones as per an English Cream Tea! This means you will want to serve them at room temperature with soft butter for spreading, as well as a pot of cream, either whipped or clotted (if you can get it), and some sweet jam. I like strawberry jam myself, but raspberry is also quite traditional. Don’t forget a nice pot of perfectly steeped English tea to serve on the side!
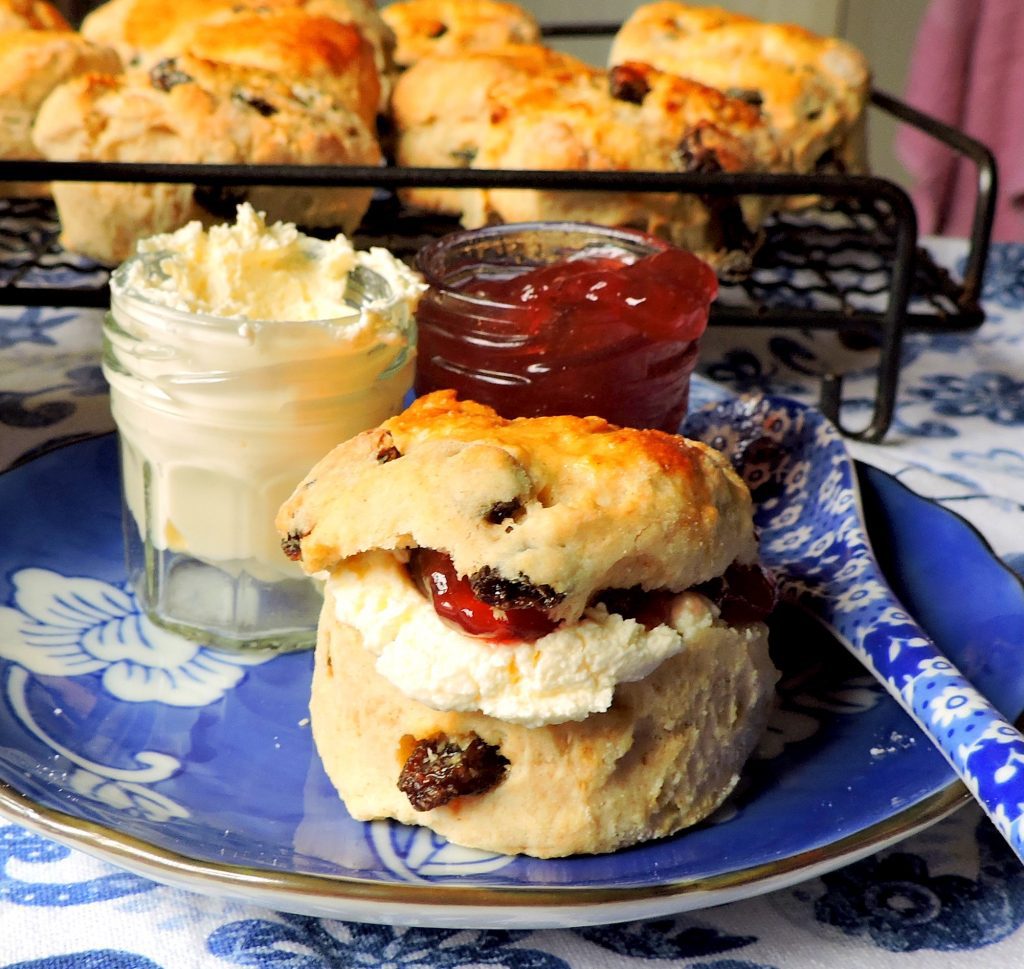
I don’t think there is a prettier or more delicious sight than a fabulously light and perfectly baked English Scone topped with some cream and jam. This is heaven to me!
To Finish Up
These classic English scones are perfect for tea time, coffee break, breakfast, elevenses, etc. In short, they are perfect for enjoying anytime, anyhow! Put the kettle on and warm the teapot up! You have only one decision left to make now. Will that be one lump or two?

Classic English Scones
Ingredients
Method
- Preheat the oven to 220*C/425*F/ gas mark 7. Butter a large baking tray. Alternately line it with greaseproof paper. Measure the flour into a bowl along with the baking powder. (Pour the flour in from up high to aerate it.) Whisk together well.
- Drop in the cold butter in bits. Using your fingertips rub the butter in quickly until the mixture resembles fine dry breadcrumbs. Stir in the sugar and raisins. Beat the eggs. Remove and set 2 TBS aside.
- Add a scant 1/2 cup of the milk to the eggs and beat well together. Stir this into the flour mixture. Mix everything together with the rounded end of a butter knife to form a soft but slightly tacky dough. Only add the remainder of the milk if your dough is too dry and you want to absorb any dry bits in the bowl. The dough should NOT be too wet, but not too dry either.
- Tip the dough out onto a lightly floured surface and knead gently a couple of times to bring well together.
- Gently pat out to a 1-inch thickness. Using a sharp round 3-inch cutter, stamp out rounds, using a direct up and down motion. Do not twist the cutter.
- Place the cut-out scones an inch or so apart on the baking sheet. Gather any trimmings together and repeat until you have 10 scones. Brush the tops of the scones with the reserved beaten egg and sprinkle with a bit of granulated sugar. Do not let the egg drip down the sides. This will hamper the rise. Bake for about 10 minutes, until risen and golden on top and bottoms. Remove to a wire rack to cool. Store in an airtight container.
- These are best eaten on the day; however, any leftovers can be frozen for several months.
Notes

Marie Rayner is a retired Chef, freelance writer, recipe developer, food blogger, and Cookbook author. She makes her home in Chester, UK, where she lives with her husband, Todd, and their much beloved English Cocker, Mitzie. Her motto is “Life is far too short to eat bad food,” and her goal is to share delicious and easy recipes which anyone can enjoy and cook in the comfort of their own home.
 Dirty Fries Recipe Your Kids Will Love