I wanted to share a really fun recipe with you today for a sweet Halloween Treat that will delight kids of all ages. Spooky Witches’ Fingers!
No, we are not really baking and eating real Witches’ Fingers. These are a wickedly easy shortbread type of cookie that are fun to make and incredibly realistic and creepy looking!
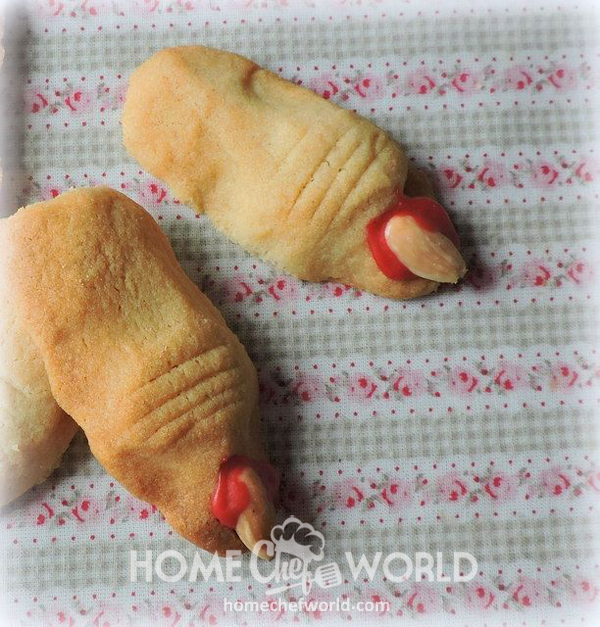
Buttery shortbread dough is shaped and molded by hand into a knobbly finger shape. Whole blanched almonds are placed on the tips and wrinkles formed into them prior to baking.
Once baked you will need to work really quickly and remove each “fingernail” while the cookies are still warm, add a dab of red icing and replace.
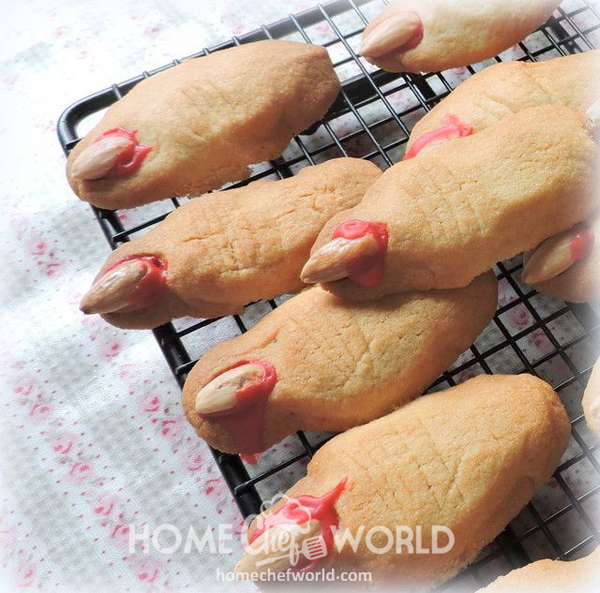
It might seem a bit fiddly, but trust me, these are not difficult at all to make with truly spookily delightful results! They actually look incredibly realistic, which makes them even more fun to make and to eat!
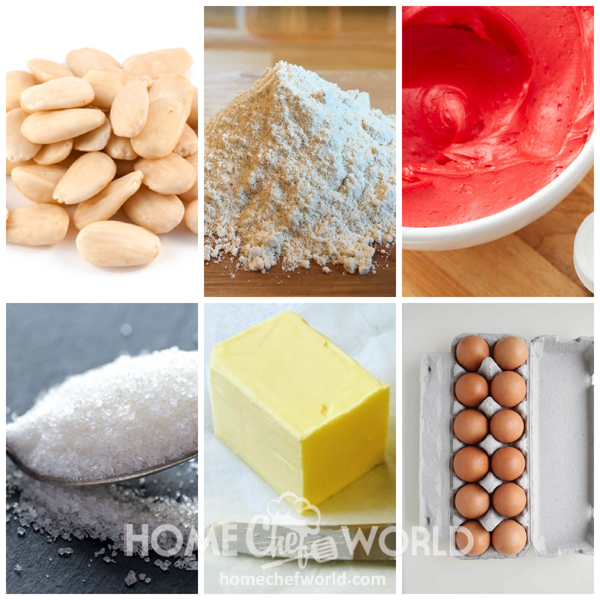
WHAT YOU NEED TO MAKE WITCHES FINGERS
There is nothing complicated or out of the ordinary here. I am sure you probably have everything you need already in your kitchen!
[frontend-checklist name=”Witches` Fingers Recipe”]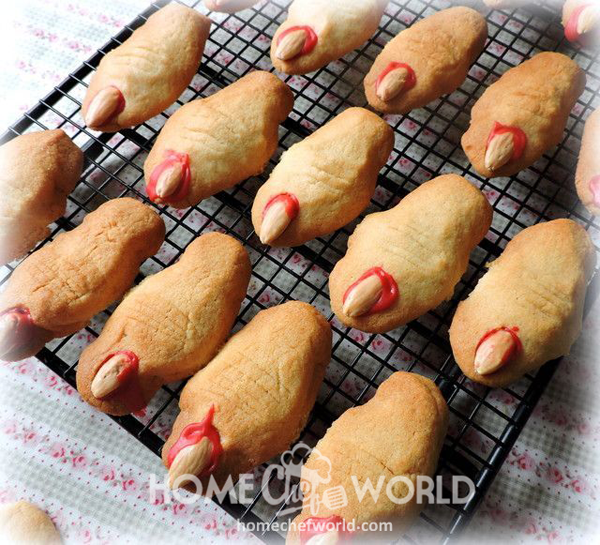
HINTS AND TIPS FOR MAKING WITCHES FINGERS
Follow my hints and tips and you can be sure of success!
- Read through the recipe several times to familiarise yourself with any steps, equipment, or ingredients you might need to make the recipe.
- Assemble all of your ingredients and equipment prior to beginning the recipe. This can help to prevent you from making any costly errors, and you will find that things move along quickly and smoothly.
- Always use the best ingredients you can afford. I always use the best quality nuts, eggs, butter, sugar, and flour I can buy, within my budget of course.
- Have all of your ingredients at room temperature before beginning if possible.
- Make sure the butter and sugar are thoroughly combined before you beat in the egg, salt, and extracts. I use an electric mixer for this.
- Stir in the flour by hand, mixing it in thoroughly.
- Shape the fingers into logs first and then create knobbly shapes from the logs, by pinching the dough here and there along the length of the logs.
- Use a sharp knife to create “wrinkles” in the shaped fingers.
- Press the almonds firmly onto the ends of the “fingers” to help them adhere prior to baking.
- Bake only one sheet at a time. That way you can be removing the “nails” and adding the icing before replacing the “nails” from one sheet, quickly, while still warm, whilst the next sheet is baking.
- You will need to remove the nails while the cookies are fairly warm or they will be more difficult to remove and you may break your cookies.
- Don’t stint on the red icing. This is what will really give them a “gruesome” appearance.
- If you wish you can serve the fingers with a bowl of lightly warmed strawberry or raspberry jam (witches’ blood) for dipping the baked fingers into.
HOW TO MAKE WITCHES FINGERS
Preheat the oven to 325*F. Line several large baking sheets with baking paper. Set aside.
Cream the butter and sugar together in a large bowl. Beat in the egg, salt, and extracts. Stir in the flour just to combine.
Shape tablespoonfuls of the dough into finger shapes, about 2 inches in length, and creating a bit of a knobbly knuckle about 1/3 of the way down. Place onto the baking sheets.
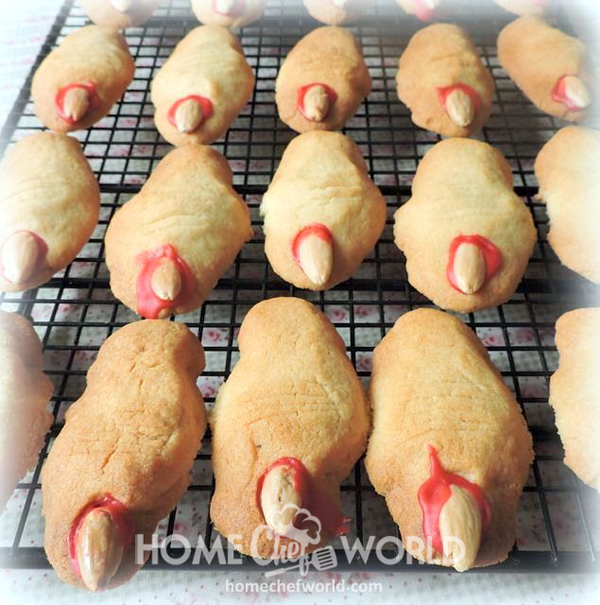
Press one almond firmly into the upper third end of each “finger” to resemble a fingernail. Using a sharp knife, gently score some slashes over the knuckle to make wrinkles.
Bake in the heated oven for 20 to 25 minutes, until golden and crisp. Remove from the oven and allow to cool for several minutes.
Carefully remove the “fingernails” and apply some icing onto the nail bed, then put the fingernail back in place. Place onto wire racks to cool completely and allow the icing to set.
These cookies will spread a bit while baking, so make sure you shape them quite thin when you are shaping them, much thinner than you want them to end up. Mine was not quite thin enough and ended up a bit pudgy looking, but some witches are fat and pudgy, right? It’s from all of those children they gobble up!
These are really cute and spooky looking. You can serve them with warmed red strawberry or raspberry jam for dipping them in, or even cups of red tinted hot chocolate.
For a really creepy looking finger you can also add green gel food colouring to the dough. This would really make them look like the Wicked Witch of the West’s fingers!
Skinny or fat, plain or green, one thing is for sure these spooky witches’ fingers are going to delight everyone in your home and may even become a yearly tradition for you. At a time like this, during the Coronavirus pandemic, when there is not a lot to look forward to in the terms of celebrations, it is the little things like this that will bring our families the most joy and happiness.
Why not bake them some creepy Witches’ Fingers for Halloween this year and really make their somewhat subdued celebrations that little bit more fun!
Print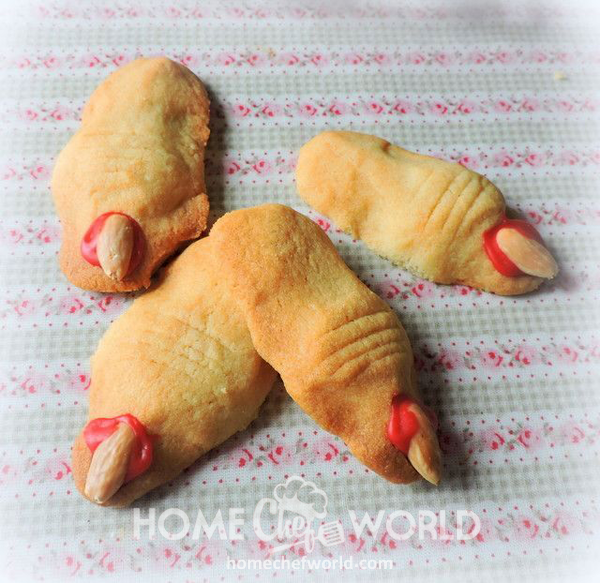
Witches` Fingers Recipe
These are really tasty and very spooky! Buttery and short, with just a hint of almond flavour.
- Total Time: 1 hour 5 minutes
- Yield: Makes about 5 dozen (depending on how large you make them) 1x
Ingredients
- 1 cup butter, softened
- 1 cup granulated sugar
- 1 large free range egg
- 1 tsp vanilla extract
- 1 tsp almond extract
- 2 2/3 cups all-purpose flour
- 1 tsp salt
- ¾ cup whole blanched almonds
- red icing (in tub or tube)
Instructions
1. Preheat the oven to 325*F. Line several large baking sheets with baking paper. Set aside.
2. Cream the butter and sugar together in a large bowl. Beat in the egg, salt, and extracts. Stir in the flour just to combine.
3. Shape tablespoonfuls of the dough into finger shapes, about 2 inches in length, and creating a bit of a knobbly knuckle about 1/3 of the way down. Place onto the baking sheets.
4. Press one almond firmly into the upper third end of each “finger” to resemble a fingernail. Using a sharp knife, gently score some slashes over the knuckle to make wrinkles.
5 Bake in the heated oven for 20 to 25 minutes, until golden and crisp. Remove from the oven and allow to cool for several minutes.
6. Carefully remove the “fingernails” and apply some icing onto the nail bed, then put the fingernail back in place. Place onto wire racks to cool completely and allow the icing to set.
Notes
The nuts will be quite warm when you are removing them, but if you allow them to cool completely, they won’t be moved easily, so it is best you do this while they are still quite warm.
- Prep Time: 20 minutes
- Additional Time: 20 minutes
- Cook Time: 25 minutes
- Category: Desserts
Nutrition
- Calories: 67 per finger, excluding icing

Marie Rayner is a retired Chef, freelance writer, recipe developer, food blogger, and Cookbook author. She makes her home in Chester, UK, where she lives with her husband, Todd, and their much beloved English Cocker, Mitzie. Her motto is “Life is far too short to eat bad food,” and her goal is to share delicious and easy recipes which anyone can enjoy and cook in the comfort of their own home.
 Sausage Green Bean Potato Casserole